
Class < Getting Started: Must Have Android Apps for the Classroom Teacher < Lesson 1 - Getting Started with your Android
Introduction
Many teachers are concerned about what to do when they initially receive their mobile device. While some people are tech savvy, many teachers are not and can feel a little bit daunted by what to do. So that teachers get the most out of their Android, it is really important that they feel comfortable with their device, know how to navigate their way around the device, have some idea how to troubleshoot when a problem occurs, and ultimately feel that the Android will be secure and safe with their students.
So, here is a basic checklist of what to do when you initially open the box of your Android:
1. Turning the Android device on:
Essentially turning on the Android device depends on the type and model you are using. Generally speaking most devices will have a button at the top of the device and you have to hold it down to power on and hold it down again to power off.
Then you may have swipe to enter into the mainscreen of the device. Most devices will give you instructions on what to do. If all else fails, your manual should tell you what to do. All devices will also have the ability to set up a passcode to gain access to your content. You will be able to gain access to this in your Settings and look for a section that says Privacy or Accessibility (this will depend on the device).
Connecting to Internet (Wifi)
Press < SETTINGS < WIRELESS & NETWORKS < WI-FI SETTINGS and then select WI-FI to turn in on. Next, choose your network, enter the password and press CONNECT. It's that easy.
If you have internet at home, just find your network and you will be prompted to enter your password.
School Tech Support workers tend to be the ones who set up the network settings on your device. This can be a good and a bad thing. It can be a good thing because they will do the technical work for you; but it can be a bad thing because they will often block certain sites, or put in settings that make the device difficult to access anywhere else other than school.
This is a discussion your school should have and I strongly suggest that they don't 'turn off' sites, instead you can set up the Parental Controls to reduce access to Youtube, etc.
Second, make sure your 'techs' make it possible for you to also access the device using your wifi at home or anywhere else. Restricting use outside of school means that you won't be able to search for apps at home; work on apps that require internet access (and most do on some level, especially for sharing); and practise using the apps so you can prepare for a lesson.
I've heard from many teachers that some of the policies of schools and restrictions placed by 'techs' limit much of the tablet's use, so ensure that this is part of your policy making decisions. (Policy decisions will be discussed further in this lesson).
2. Using your SD card.
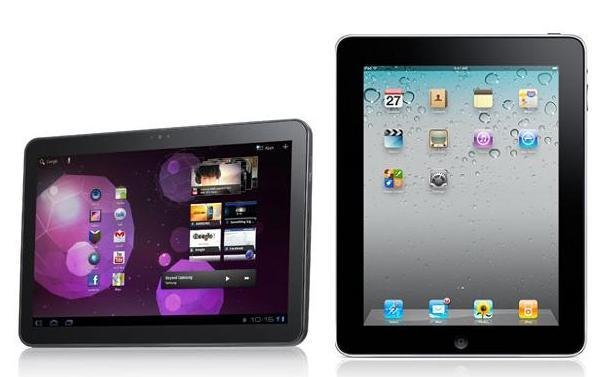
Depending on the Android device that you are using, it may only have 8 or 16GB storage, but one benefit of the Android over the iPad is that this storage can be expanded using an SD card. The ability to use portable storage to expand the capabilities of an Android device is extremely beneficial, but it's not always as straightforward to use such storage as you might think.
Keeping your files stored on an SD card rather than on your tablet makes it easier to swap them from device to device. It also keeps your tablet’s storage free for things such as the OS and apps. This helps to make sure your device runs smoothly and faster.
Every device is different and it’s always a good idea to check with your instruction manual before you use the device. Also, if you go to the manufacturer’s website, they almost always have very good explanations of how everything works, troubleshooting and tech support. Don’t hesitate to use this resource as they can often be extremely helpful.
If you want to move apps or data from the device to the SD card, here is some general advice (although remember that every device will have its own unique settings).
Moving apps from Android phone to SD card
This is not always possible because of the nature of SD cards, so many Android manufacturers won't let you run apps from the SD card - you can't on some of the Galaxy devices, for instance. Partly this is because of performance reasons, and partly because the SD card is outside the walled world of a Google account which may make permissions tricky.
This isn't the case with all Android devices, however if you can move apps to your SD card, the process is generally: go to the Apps menu, find the app you want to move, then through that particular App's settings, select move to SD card.
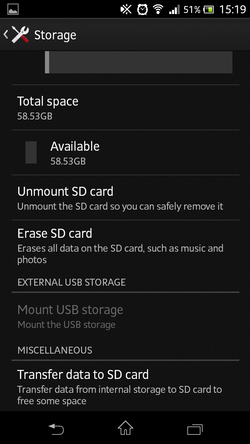
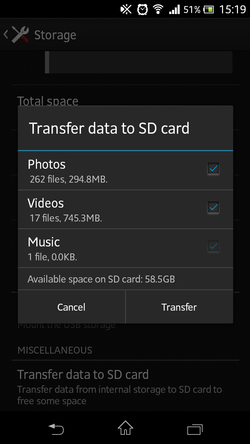
If you can't move apps, you can definitely move date from your tablet storage to the expansion card. By default files such as music, movies, photos and documents will save to the device.
Go to your device’s app menu – find something called 'File Manager' (or something similar) or Settings & then follow the instructions to transfer your files across to your SD card, or vica versa. This may look something like this:
3. What to consider before you deploy Androids into your school and classrooms:
• How will you use the Android? I believe 1:1 Android use is the most appropriate or viable way to deploy Androids into the classroom. This gives each student ownership over their Android; all of their work is stored on the one Android; the Android is readily available to the student when they need to use it.
• Security Issues: ensure that the Androids are all set up to prevent students from accessing sites, videos or apps that are not appropriate for them. I think it is preferable to select 'age' limited access or 'ratings' limits rather than make a site completely inaccessible. For example, YouTube is an incredibly good resource and many schools have this site as a restricted site.
• This way you can make available sites like YouTube that are normally restricted for students. Being able to restrict the content by setting age and ratings limits, means students can still watch age and education appropriate content. YouTube is an invaluable resource and I think shutting it off altogether cuts off access to some really great educational videos.
If your school insists on blocking YouTube, there are other alternatives. For example, you can use software such as YouTube Downloader (Click on link to go their website) to download educational Videos that you would like your students to watch and store them on the device. This is a really good option if this is a video you intend to use regularly. There is a free version, but you can only download one video at a time. I use this vesion and don't find it limiting.
• What apps will you use and how will you use them? Having a core list of apps really helps. When I first started out on this journey, I had too many apps.It was overwhelming for me to try to learn how to use them and then teach the students how to use them.I now, think it is wiser to start with a few apps….get to know how to use them and how to use them in your classroom. Then you can add apps as you go.
I'm also concerned that many schools make it almost impossible for teachers to download a new app that they want to use in their classroom. I hear stories of teachers having to apply to upload the app and then it has to be approved etc etc which can take months; which means that is months of valuable instruction that students are missing out on because of bureacracy. Part of your school policy should allow teachers to download apps that are appropriate for them to differentiate instruction in their classroom. We have to trust that our teachers know what they are doing.
• Make sure you know how the apps work. I suggest using the apps and playing with all the settings. Go through each step of the application and be aware of each step of the application. Can the app be adjusted in the settings section? Is there a way to make the app easier, or harder? Think about how you can use these apps in an educational context and how you can integrate the technology into your lessons.
NB: I am going to add an evaluation (click on word evaluation to be taken to a template that you can use) for apps that I think is really useful when considering your Android choices. You can download it and use it each time you wish to purchase an educational app. Other things you can do to determine if an app is going to be beneficial for a classroom is: to go to the reviews of the app; go to YouTube to see if there are any video reviews or demonstrations; go to the developer's website as they often have app demos, videos and uses for the app on their site.
• Taking courses like this can help you to navigate your way through the minefield of apps and get some idea of what apps to use.
• Go to Vimeo, Teacher Tube and other teacher educational sites. There are many reviews on how to use apps on these sites and additionally there are lots of videos made by other educators on how to use certain apps in the classroom. This is a fantastic resource and one I highly recommend. When you explore what is out there, you discover that many teachers out in the world are doing fantastic things.
• The really good apps are made by really good developers. They care about you using their apps and generally will have a really good website with instructions using screenshots or video on how to use their apps. Good developers will have a space for feedback on their apps and are willing and happy to receive your recommendations. I’ve even had developers Skype with me to show me how to use their apps. Also, if there is something missing in the app that you think would make the app better, don’t hesitate to recommend it to the developers. They take every comment on board and if they receive ‘x’ amount of requests for improvement, they will include it in their next updates. This is how they do their updates, by receiving your feedback.
• Allocate the tablet for educational use only. One of the very early decisions I made was to only have educationally based apps on the Android….this did include educational games….but I left all other games off the device at this early stage.
• I believe it is a vital in the early days to leave all games that are not educationally based off the Android. I think children have plenty of opportunity to play games using various other technologies like the Nintendo DS, Wii, Xbox, Computer Games etc. Keeping the Android as an educational tool ensures that students will view the technology from this perspective.
• The Android should not be used a ‘fill in’ or for ‘rewards’ - if the technology is being used this way, then it is not being used effectively and more importantly is not being utilized to create the best possible educational outcomes.
• The device cannot do the work for you or replace you as a teacher….you have to drive its use…be at the control panel. You decide what apps to use, how to use them and how you connect them to your overall curriculum and lesson plans.
4. Settings, Childproofing & Policies
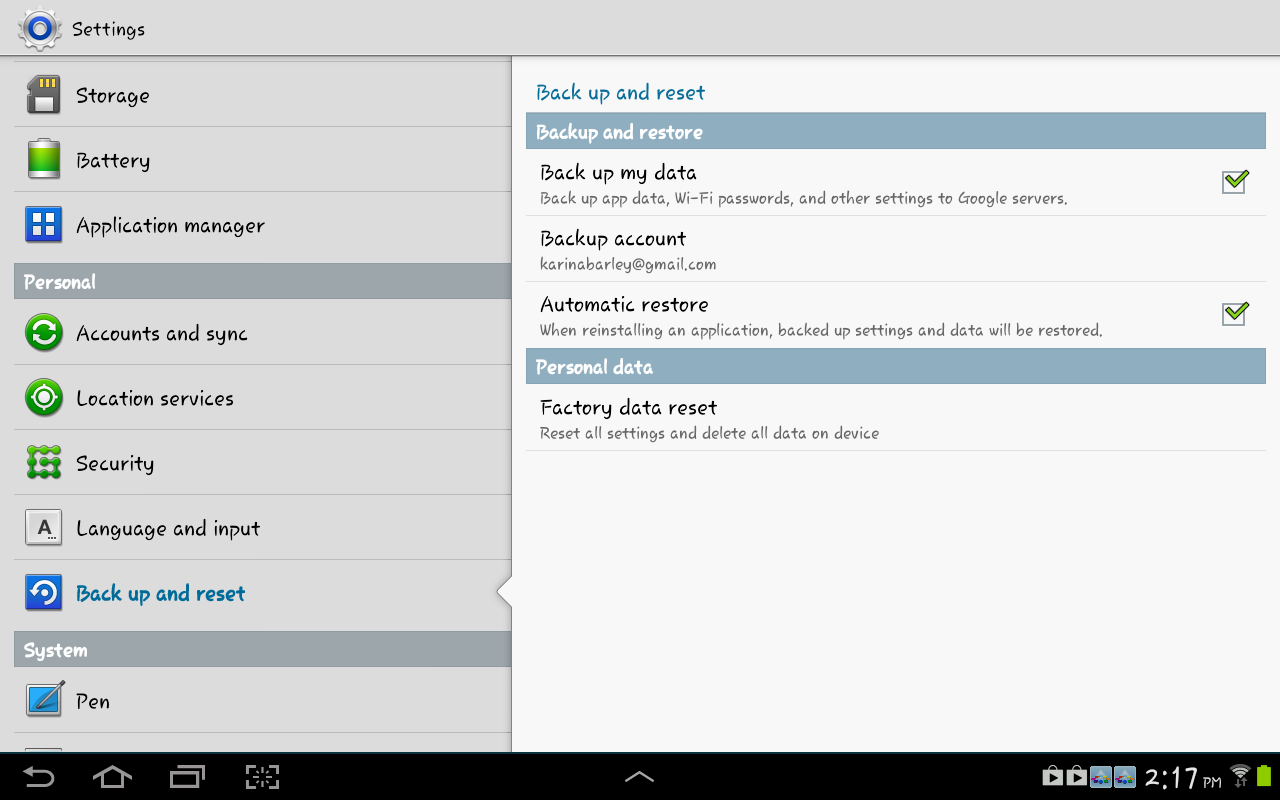
It is extremely important to back up your device. This is to safeguard your content, because if you lose your device, if it damaged or stolen you can easily reset all your previously acquired content.
Backup your Tablet often. Here are some things to consider: if you have a Google account associated with your device, some applications and settings you won't need to worry about backing up. For example, contacts as these are automatically synced with your Google Contacts, email, calendars, and Talk conversations. Additionally, some system settings, such as WiFi network passwords, as well as app purchases on the Google Playstore are all saved via Google. Go to Settings and to 'back up and reset' - see below.
With Google covering the bases when it comes to phone contacts and settings, other content like images, documents, PDFs, and media files can be backed up on your favorite cloud storage service, such as Google Drive, Skydrive, Dropbox etc. Photos taken from your camera can also be automatically uploaded to Google+ with the Instant Upload feature, allowing you to instantly update your photographs online. You can click on the icons to be taken to the app in the Google Playstore.
.png)

Back Up Applications: There are a number of back up applications, but most of these require you to root the device. Android rooting is the process of allowing users of smartphones, tablets, and other devices running the Android mobile operating system to attain privileged control (known as "root access") within Android's subsystem.
Rooting is often performed with the goal of overcoming limitations that carriers and hardware manufacturers put on some devices, resulting in the ability to alter or replace system applications and settings, run specialized apps that require administrator-level permissions, or perform other operations that are otherwise inaccessible to a normal Android user.
On the Android, rooting can also facilitate the complete removal and replacement of the device's operating system, usually with a more recent release of its current operating system. Many apps on the 'Android' device require 'rooting' to run the application however 'rooting' the device will void the warranty. I would not recommend 'rooting' your device because of the warranty issues; so for educational settings, this is not a viable option. I believe this puts the 'android' tablet user at a disadvantage because without 'rooting' one cannot have access to applications that are freely and viably available on the iPad.
5. Google Tools
Whether you are using an Android Device or a Chromebook, Google have provided a myriad of tools that are ready made for Google Products. (click on all the icons in this section to be taken directly to the various tool's links)
It is impossible to cover everything in this one course, but I can direct you to some really good Open Education Resources (OER) that have short courses, app lists and instructions on how to use the various Google Tools.
At the bare minimum, you should know how to find and use Google Docs, Google Play Store, Google Drive, Google Plus, Google Maps and be aware of what resources will work effectively for your classroom.
Google Docs
 Essentially, Google Docs is a free online word processor, spreadsheet, and presentation editor that allows you to create, store, share, and collaborate on documents with others. The benefit of Google Docs is that its flexibility allows a number of people to work on the same document at any given time. This could be extremely beneficial in education as a student could upload their work, then the teacher could add notes and the process could go back and forth. Click here to find out about how collaborative Google Docs & Google Drive (see below) can be. Alternatively a group of students can work collaboratively on the same piece. Go to this link for an excellent 'Crib Sheet' on how to use Google Docs.
Google PlayStore
 is basically the Google App Store equivalent. It is here you can purchase apps, music, movies, books etc that can be used on your Android device or Chromebook.
Google Drive
 Google Drive is the home for your all your files. It is a Cloud based service and with Google Drive, you can share files like documents, images, and PDFs without having to email them as attachments. Sharing is as easy as indicating which email addresses or mailing lists should have access to a given file. Click here for instruction on how to use this tool.
Google +
![]() Google Plus is an online Social Networking site similar to Facebook, but it has so much more. Click here for a fantastic OER on how to use Google Plus.
Google Plus is an online Social Networking site similar to Facebook, but it has so much more. Click here for a fantastic OER on how to use Google Plus.
Google Education
 Google have an extremely good education site where you can discover lots of information on Google apps and other Google Resources. For example, they have a short online course on Chromebooks and what they can offer to education. It will only take you about 40 minutes to go through all the videos but it is worth looking at if you are going to be using Chromebooks in your classroom. (Click on the word Chromebooks (above) to go directly to this course). Also click on the Google Education icon to be taken to the Google in Education website). As you will see they also have brief courses on Google Apps, Google Drive, the Internet and Gmail.
Gmail
 Gmail is Google's web based email server. You can access Gmail from a PC or Laptop, Chromebook, your phone or Tablet device. Google have made a lot of improvements to this service by increasing storage, contacts and productivity. However, it is important to know that schools should sign up for a Google Apps Account in order to connect their school, teachers and students using Gmail. This service has significant advantages for schools, including removal of advertising, increased storage, personalisation of accounts etc.
Please read this blog by Mike Reading to understand the differences between a personalized account and a Google Apps Account. You can also sign up to access a free Google Course on using Google Services in Education.

Google Maps & Google Earth
![]()
 Google Maps (Click on link to be taken to Google's page on Google Maps and Google Earth) and Google Earth are two of the most underused resources in the classroom. I've been using it since I first had an Interactive Whiteboard in my room and both of these apps just get better and better. In Google Maps, you can go to a site and then take a street view and walk around as if you are actually at that location. This is not only extremely beneficial to improve your lessons, but also valuable if you don't have the resources for excursions. It is also a great resource for your children who have autism and need visual support or social stories and then you can take your students on a world tour.
6. Multitasking using the Android
All versions of the Android OS have a multitasking feature. Generally, open any app and use it. When you switch to another app, the previous app moves to the background where it stays running. You can then switch back to your previous app instantly. The android automatically manages apps running in the background, but you can influence them also.
The new Samsung Galaxy has some great multitasking options. Watch the video below as it is a great tutorial on how to use the various multitasking features.
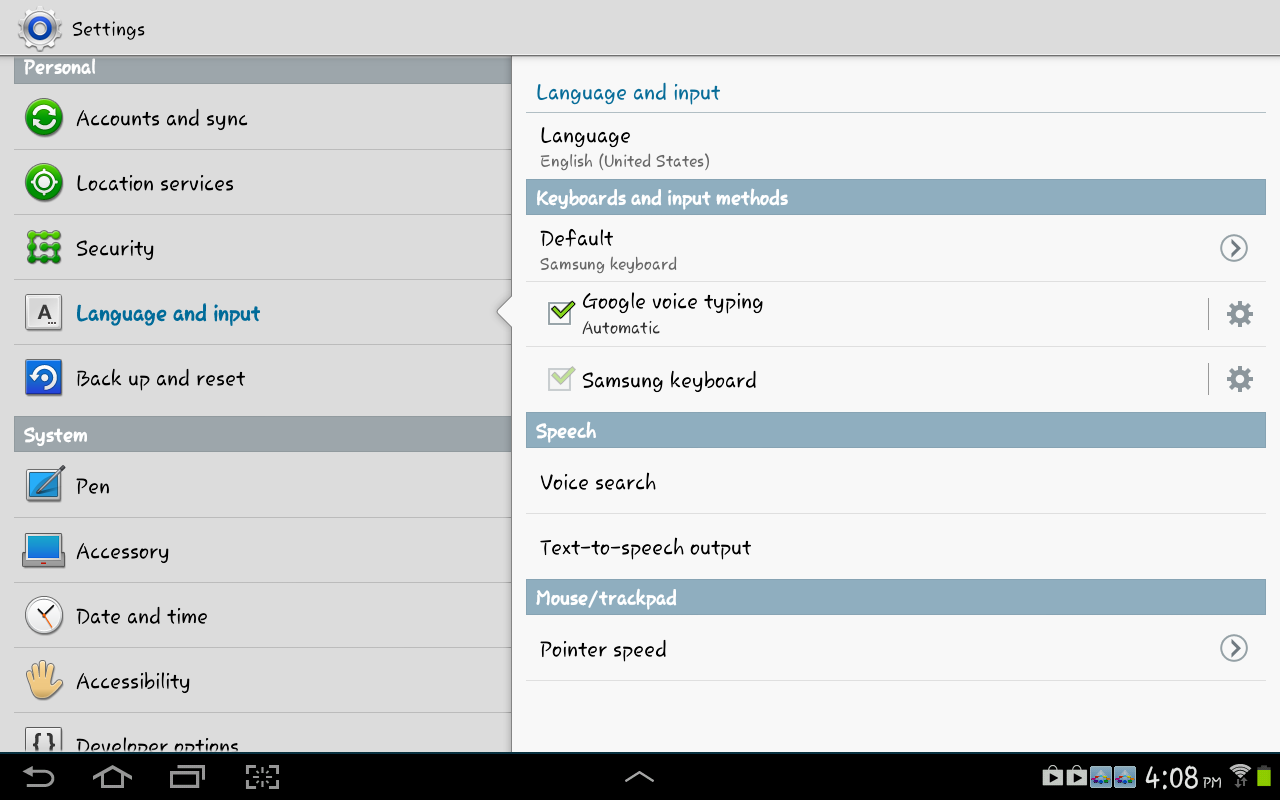
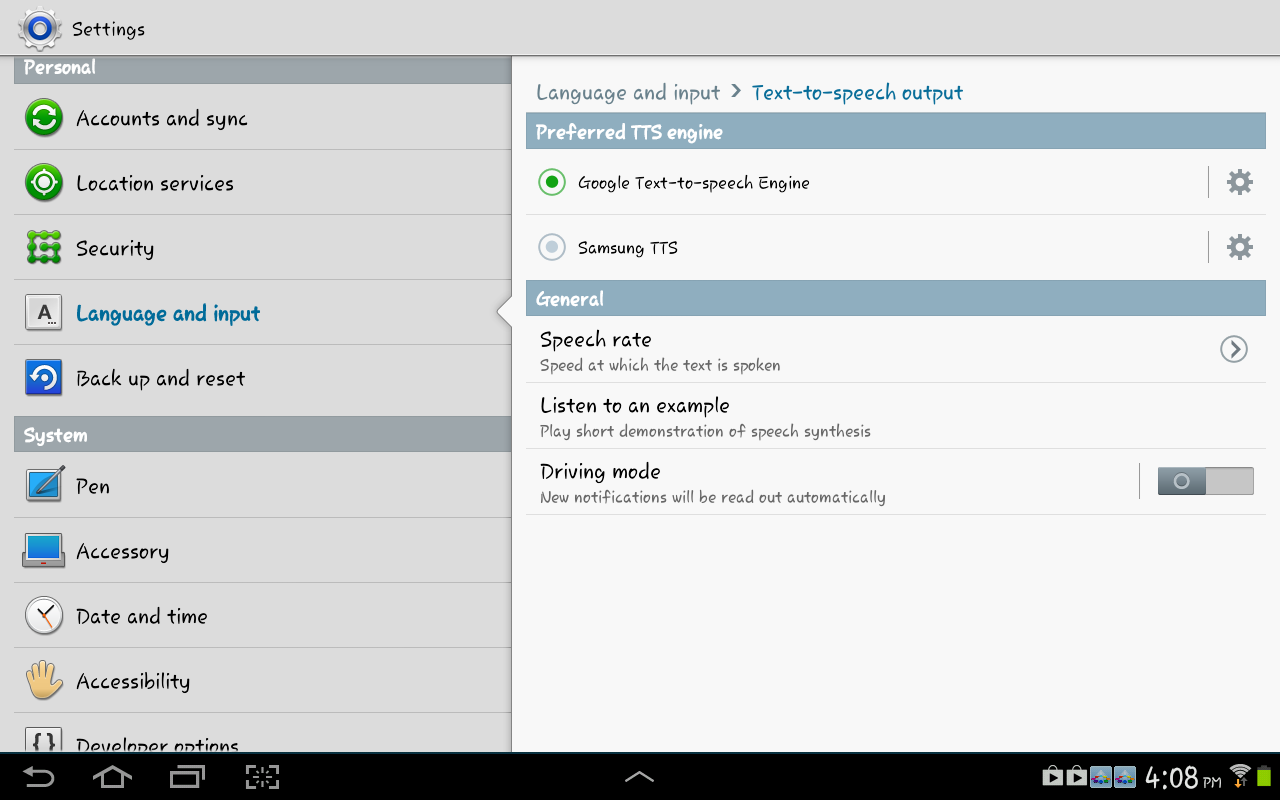
7. Language Input & Text to Speech
In Settings under Language and Input you can choose the Text to Speech option. You then have various options on speech rate and mouse tracking. This is a fantastic application for those students who have difficulty with reading, or sight. See screenshots below on how to locate this function:
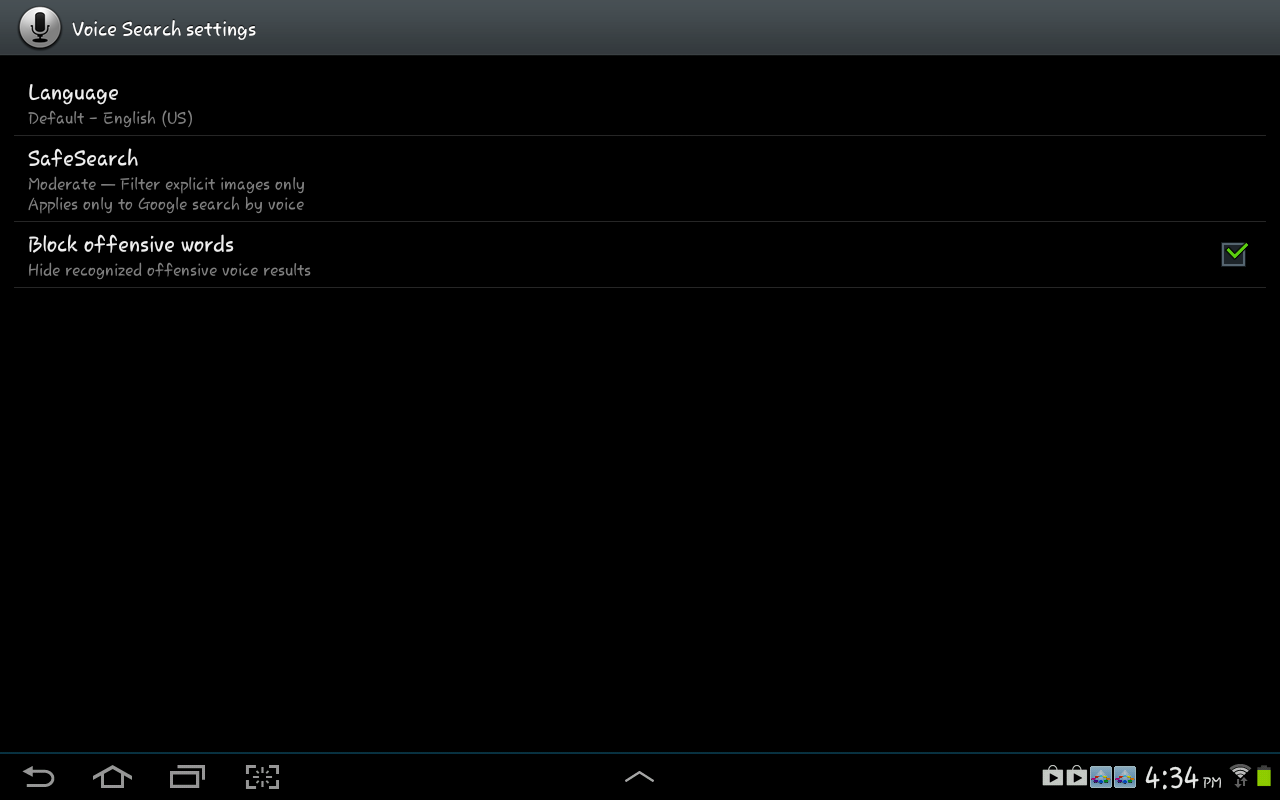
There is a great unique feature under the 'Voice Search' tab where you can filter out certain words and bad language. This is a very good feature for an educational setting.
Finally, you can select the Text to Speech Output.
8. SecurityTips:
Set up a passcode to help prevent unauthorized use of your mobile device.
Go to Settings > Security > Select Screen Lock to set the level of security you would like, including choosing a password which is the highest level of security. See screenshot below:
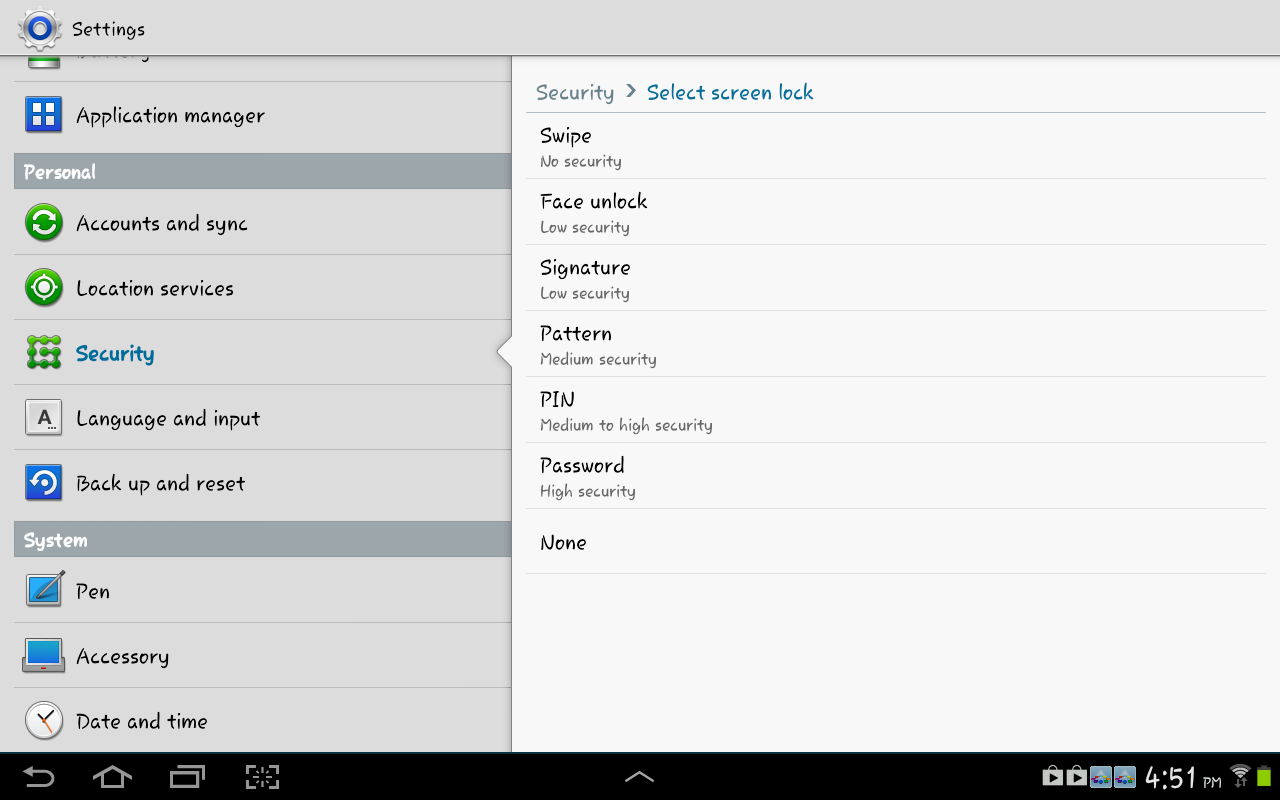
You can also encrypt your device which would require a password every time you opened it: I would only really suggest this if you had really sensitive information on your device because encrypting can cause your Android to run slower and takes a while to open up each time which could become tedious.
Disable Bluetooth if you do not plan to use it. If Bluetooth is active it is another potential vulnerability source so if you are not using it shut it off.
Go to Settings > Wireless and network > turn Bluetooth off.
Install app updates promptly when they become available. When hardware or software is updated by a vendor it can be due to security vulnerabilities so it is best to stay current with these important updates.
One of the things I really like about the Android is that it updates as you open the application so this makes this step fairly simple.
You can also use an application to childproof your device. One such application is Kids Place Parental Control (Click on the name to be taken to a Youtube video demonstrating how this app works). This is an app launcher with parental controls & a child lock that protects your personal data and restricts kids to apps you have approved. Kids Place also prevents children from downloading new apps, making phone calls, texting or performing other actions that can cost you money. Includes convenience features for parents such as auto app restart, useful for small kids who accidentally exit launched apps.
|
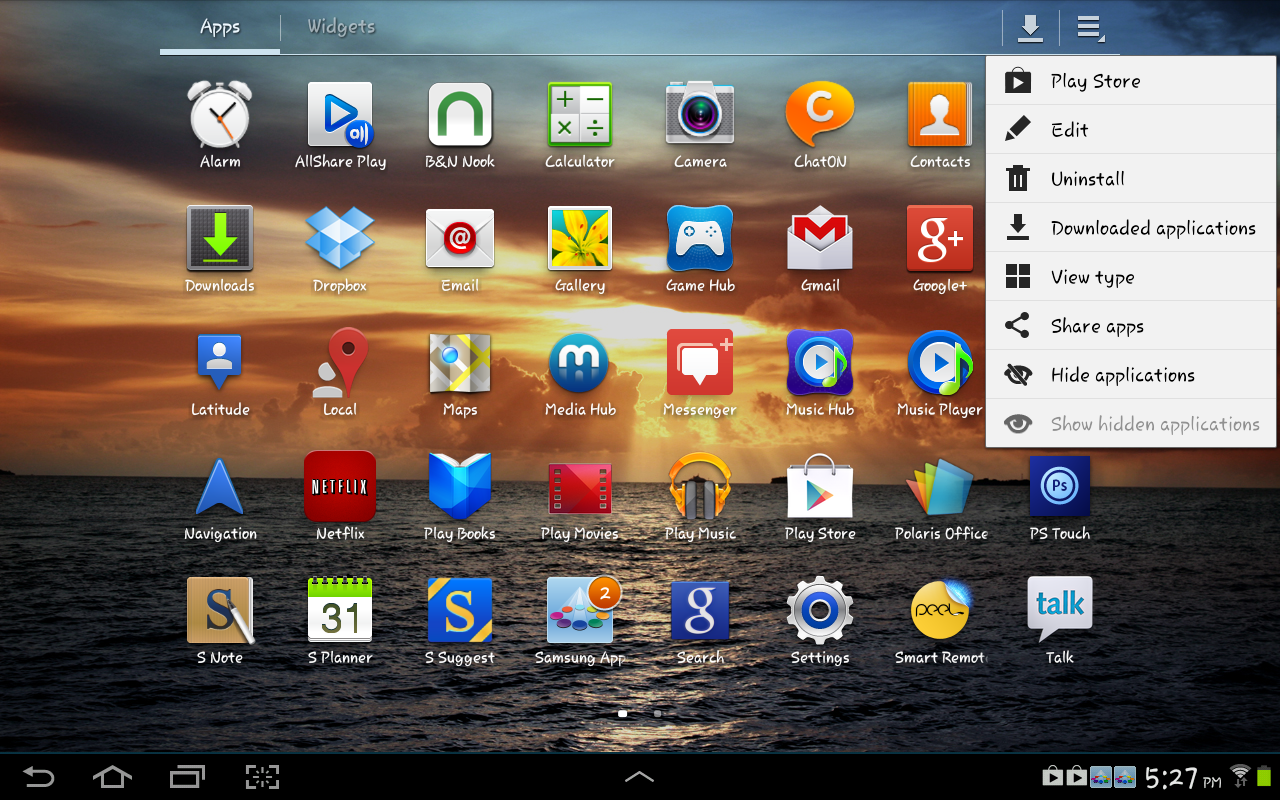
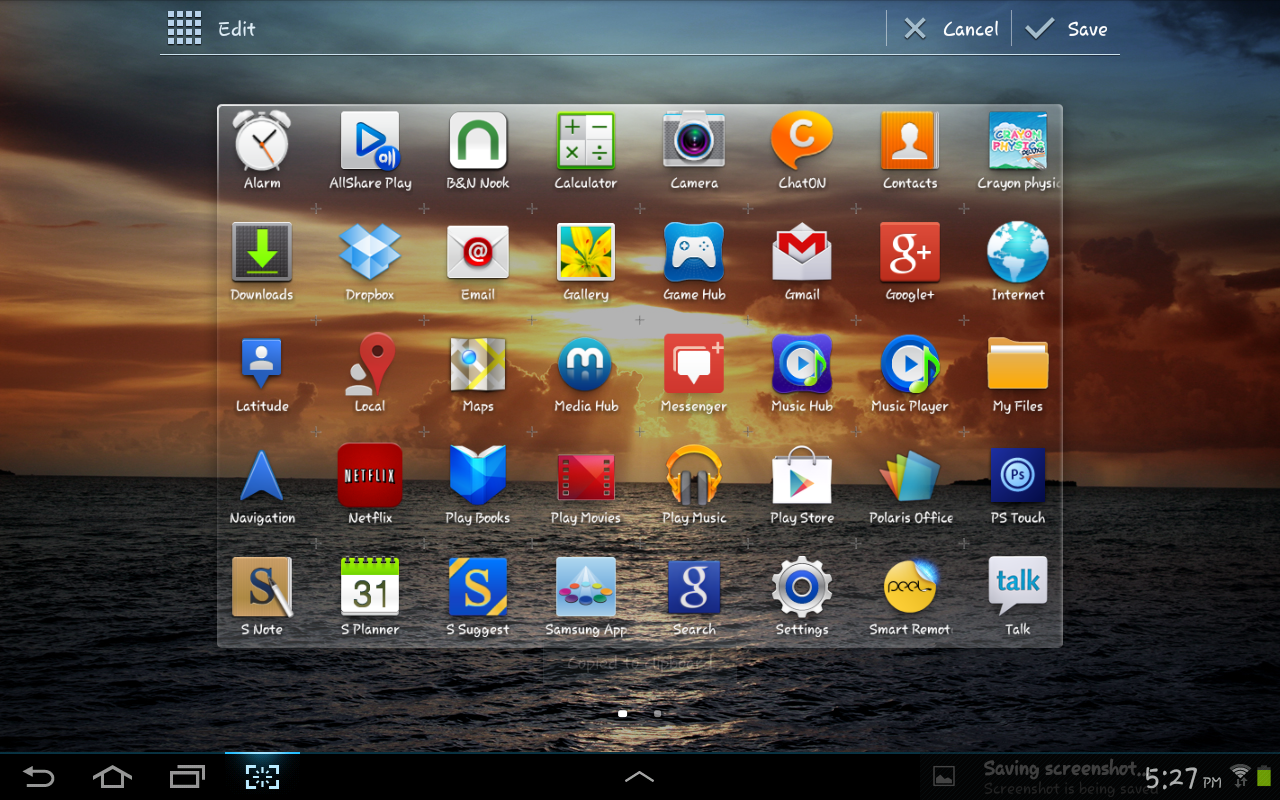
9. Organizing Your Applications If you have quite a few apps, it is time to organize them. There are a couple of ways to do this. Organizing your apps into folders can help by combining like apps in one place, which makes future retrieval much easier. If you are used to previous Android phones where you simply drag one app on top of another to create a folder – you might be frustrated that Samsung has changed that intuitive approach with the Galaxy. However, it's realitively simple. - Click on the icon on the top right hand corner of the screen. - Hold down any app and you will see at the top of the screen an option to open a folder. When you open the folder you can give it a name of your choice. - Alternatively you can click on the first icon that looks like a ladder, this will give you a drop down menu. Choose edit and you will be able to create a folder from this option.
- You can then move these apps around how you would like.
Please see the video below for more details: For apps you use frequently, you can drag the app icon down to the dock so that is available on each page. This will allow you to find an app quickly, no matter which page you are on. To drag a folder into the dock, you will have to create it first on the screen, and then drag it to the dock. Organizational Methods There are many ways you can arrange your apps including by location, alphabet or categories. I have organized my apps according to Subject i.e. Literacy, Numeracy, Spelling, Writing, Art, etc. Everyone has their own system, so it is best to stick with what works for you. If you are organizing applications for students, make sure they are names that the students can read; or to begin with you might use the first letter of the folder instead, ie E for English & M for Maths. 10. Mobile Technology Policy The focus of any Tablet program is to provide tools and resources to the 21st Century Learner. Excellence in education requires that technology is seamlessly integrated into any school's curriculum by increasing access to technology and one of the learning tools of these 21st Century students is the tablet. The individual use of Android device is a way to empower students to maximize their full potential and to prepare them for college and the workplace.
Adding technology to the classroom does not diminish the vital role of the teacher. Rather, it transforms the teacher from a director of learning to a facilitator of learning. Students organically become much more self directed and independent as learners when they are given the opportunity to use the tablet within the classroom. Effective teaching and learning with mobile technology integrates technology into the curriculum anytime, anyplace.
Any policy should reflect what you require students to achieve using technology. I've seen too many policies focus on rules and regulations around technology use and while security; keeping children safe on the internet etc is important; we don't want to have so many rules that we limit the use of the tablet either. It becomes a bit of a balancing act, ensuring you keep children safe and giving them freedom to learn.
WHAT YOUR MOBILE DEVICE POLICY SHOULD CONSIDER:
It is a good idea to research other tablet policies implemented in other schools. I think Defiance City School in Ohio has a really good iPad policy that is worth reviewing. Whether your school uses iPads or Tablets, a policy like the Defiance City School is worth looking at. Click on the name of the school to be taken straight to their website. |

© Karina Barley 2013